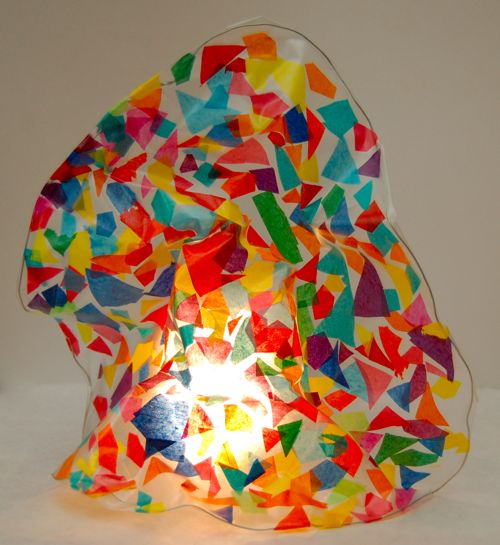
The neat thing about this beautiful “glass” sculpture is that it is flexible and can be re-shaped again and again! Emily was so proud of her sculpture, and they are simple and frugal to make using materials you probably already have on-hand.
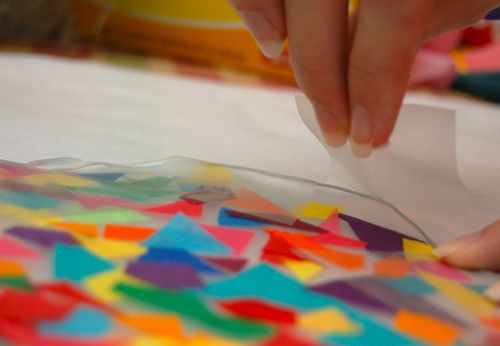
I used wired cutters to cut a long piece of thin gauge wire, and bent it into a hoop shape, then laid it on top of a sheet of clear self-adhesive paper
with the sticky side facing up.
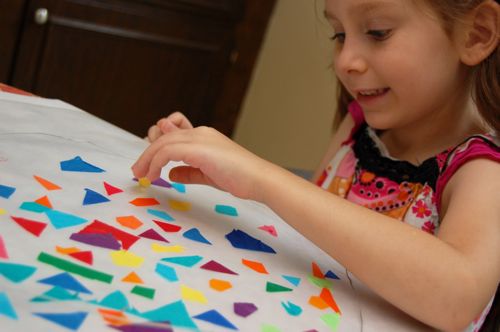
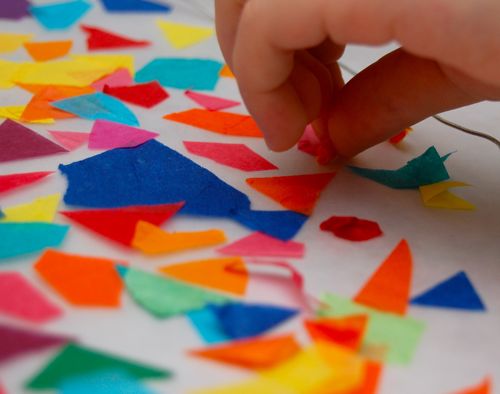
Emily spent a long time sprinkling bits of bright colored tissue paper scraps on top — so colorful!
She didn’t need any encouragement from me to cover the entire circle!
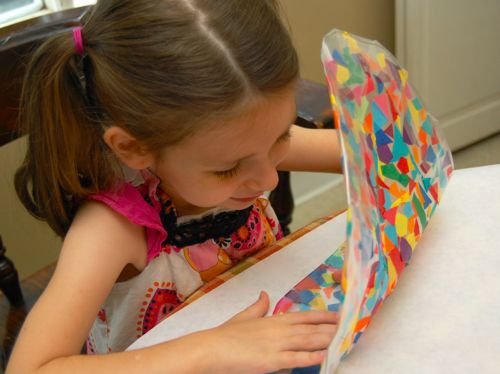
When she was done with that, I trimmed about a 2 inch border around the wire, and made slits every 3 inches or so to wrap the contact paper around the wire as shown.
Arrange your sculpture any way you like!! Like most sculpture projects, this is a fun hands-on way for kids to learn about form and balance.
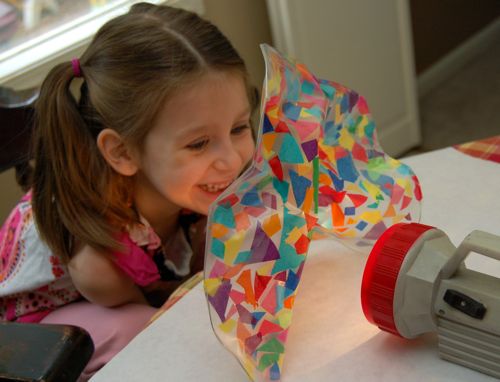
They look even prettier with a flashlight shining through!
Try re-shaping your sculpture to make different works of art over and over!
Added bonus — very little clean-up!
Have fun!!
I linked this post to:
Frugal Fridays @ Life As Mom
Weekend Wrap Up @ Tatertots and Jello
Made by You Mondays @ Skip to My Lou
Get Your Craft On @ Today’s Creative Blog
Disclosure: This post contains affiliate links. Thank you for supporting us!








I’ve used tissue paper and clear contact paper to make suncatchers, but never seen using the wire and creating a sculpture. What a cool idea!
Thanks, Scott! I think I’m going to make my own sculptures too. I can’t let Emily have all the fun! 😉
This is one of the most delightful and amazing art ideas I’ve run across in ages. Thank you!!!
Very cool!
😀
Great idea but can I ask did you put more contact on the back or is that side still sticky?
Since Emily covered almost the entire thing with tissue paper, I didn’t need to use contact paper on the other side. If it’s still too sticky, you can always use more on the back. Hope this helps! They are super-fun to make!
This is such an original idea – I love it, and I think we will try it for one of our weekend craft times.
Yay!! 🙂
Great idea!!! Thanks for sharing! Did you put a piece of contact paper over the top so that there wasn’t any “sticky” left? http://www.icanteachmychild.com
Oops…I didn’t read the other comments. YOu already answered my question. 🙂
No problem! The important thing is to wrap the contact paper around the wire, not just sandwich it in-between, or the wire will poke out when you try to re-shape it. Depending on how much tissue paper is used, you can get away without having to add a backing. Hope this helps! They are a lot of fun!!
I was going to ask the same thing as Deanne, but I see that you already answered the question. Very cool idea! Love it!
Tricia
P.S. Thanks for your kind comment on my last post.
You’re very welcome, Tricia. I hope you are feeling a bit better. I’ve been thinking of you and keeping your friends in my prayers.
what a lovely idea, thanks for sharing..
🙂 Christina
That. Is. Cool! I love it:)
LOVE the color, LOVE the freedom for the kids to go wild, LOVE the price to make it. Thanks. We can’t wait to do this one.
Yay!! That makes me very happy!! Would love to see how they turn out — it was a big hit at our house. After Emily made this one, she made another one just for Clara to play around with. So cute!
I’ll be linking!
Awesome! Thank you for all the wonderful linky love, Lenetta! I really appreciate it! xoxo
Salaam ya’ll. I love your ideas using contact paper. My daughter (2) loves to work with glue sticks but it’s kinda nerve wracking. This is a much better idea. I need to run out and get some tomorrow. We have heaps of tissue scraps from the Ramadhan flowers we made earlier in the week.
Thanks for the great tips!
Clear contact paper really comes in handy for arts & crafts. It’s perfect for no-mess projects! Have fun!!
gorgeous! I can imagine that cellophane would look stunning as well. Thank you for sharing – I will be definitely saving this one for inspiration 🙂
I first tried this using cellophane, but it didn’t work nearly as well. I think the clear contact paper holds up to the shaping/re-shaping much better. Have fun with it, and thanks so much for stopping by!! xoxo
Very fun!
Oh, how clever and wonderful! I love it!
Oh this would be too much fun for words. Now where is my contact paper?
oo this turned out super cute! I have the hardest time finding contact paper!! Any tips?
Hi Lindsay! I can almost always find it at both Target and K-Mart. It’s usually with the shelf liner. One roll will last quite awhile! 🙂
This is a really neat idea that I will have to try with the kids! I have to say, thanks, you have been a huge inspiration, and I have shared your blog with many! We use some of your ideas in the local mom’s group that I run.
That is FANTASTIC!! I’m a former Activities Coordinator for my local mom’s club, so I know how difficult it can be to find things for the kiddos to do that don’t cost a lot of money. I’m so glad you found our little bloggy-blog! 🙂
so creative I love it. I’ll have to remember this my boys would luv this. Super cute
Cool idea!
This is lovely, I really like sculptability of it, too =)
Love this! We have been trying to keep busy inside to escape the heat, this will be a fun craft today and the best thing is I already have everything! Found your blog this morning, love all your ideas. Thank you!
Fantastic!! And welcome to FFFB! 🙂 Have fun!
That is so pretty. We have done a lot with contact paper and tissue paper, but this is just amazing!
Thanks Christy! The wire really adds a whole other dimension to this project — it’s a lot of fun! I want to make one too!!
That came out great!
OoooOOo, Totally stunning! Thanks Valerie!
That is just gorgeous! How fun, simple and stunning! I found you through oneprettything and can’t wait to try this!
-Kara
http://littlelearnerslounge.blogspot.com/
Yay!!! Welcome to FFFB — I’m so glad you found our little blog! We are big fans of One Pretty Thing too!! 🙂
Thanks for the idea! I used it with my children and blogged about it, with a link to you, here:
http://created2bcreative.blogspot.com/2010/08/one-crafty-crew.html
beautiful , i will be doing it with my 2 and 4 years old tomorrow . thank you for sharing
Genius!!! Love it as always Valerie. : )
i love this! will be on the lookout for wire and tissue paper around these parts so we can do this!
I love this! It’s absolutely beautiful!
You’re so creative. … I’m sure you already know that, but I had to convey my amazement :)) Great idea! Thanks. .. and thanks for making it easy!
This is a great idea! LOVE contact paper!!
Jamie
http://handsonhouse.blogspot.com
I love the idea! I have a question though…do you attach the two ends of the wire–wrap it around each other or leave the circle open ended?
I wrapped the ends around each other.. Hope this helps! 🙂